
Yes, it’s that time of year again when the promise of Christmas is just around the corner. Literally round the corner, as the Bath Christmas Market sheds are being erected a stones throw from our café.
Whether or not you are a fan of the annual shed-fest, you can’t help but enjoy the atmosphere & festive spirit and also shout a loud “Hurrah!” for the seasonal return of Gluhwein (also called Mulled Wine).
As always, we will be offering fresh home-made Gluhwein in the café which we make ourselves to a traditional Austrian recipe. Don’t be fooled by bought in pre-bottled imitations (sadly widespread at this time of year).
Want to make some? Heat a bottle of robust red wine with a halved orange studded with cloves and a whole cinnamon quill. Add a splash of fresh orange juice & granulated sugar to taste. Bring almost to the boil then lower the heat.
Add a shot of Brandy or a shot of Amaretto for an extra kick!
Top Tips for the Bath Christmas Market:
Visit during the week if you can. Mondays, Tuesdays & Wednesdays are the best days. I cannot begin to describe how hard it is to walk around the market at the weekend!
The ski chalet at the Abbey Hotel (just opposite us) has a brilliant atmosphere for a tipple in the evenings.
Come in to Cafe Retro for a Gluhwein- it’s the best!
We haven’t had a stall in the market for a few years but we have our delicious homemade soups & goulash and of course the mulled wine here in the cafe for you to enjoy.
Tags: amaretto, bath christmas market, cafe retro, christmas, cinnamon, clove, gluhwein, mulled wine, orange, recipe, wine

WARNING: this may be addictive!
The basic ingredients are the same although I think if you add raisins & then cover the bar with chocolate you have a Tiffin, if there are marshmallows in it it’s a Rocky Road anything else is a Fridge Cake. As long as it tastes good, who cares?!
If you have been into the Café or Take-Away this week and tried some you may be desperate for another fix, so here’s how to make it:
March Recipe: Retro Rockin’ Tiffin
Generously line a shallow tin/dish approximately 20 x 20 cm square with cling film
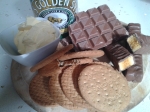
Put 125g Digestive Biscuits into a deep bowl and bash with a rolling-pin. You don’t want the biscuits to be completely powdery but at the same time you don’t want the chunks to be too large as it will make the finished bar harder to cut. Mix in any other ingredients such as raisins/marshmallows/nuts/dried fruit, I would recommend doing this by sight as everyone has their own personal preferences.
Put 100g Butter, 2tbsp Golden Syrup into saucepan on a gentle heat until melted & bubbling. Remove from the heat & stir in 200g Milk Chocolate (broken into pieces) and stir constantly until the chocolate has all melted evenly.
Pour the chocolate mixture into the dry ingredients and mix together thoroughly until completely combined. Spoon it into the tin, smooth the top & place in the fridge.

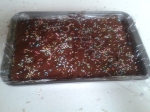
For my version, I crushed 2 Crunchie Bars with the biscuits for a honeycomb flavor and then threw in a handful of White & Pink Marshmallows. I then melted 200g Dark Chocolate with a small knob of Butter in a bain-marie (bowl resting above a pan of simmering water – make sure the bottom of the bowl does NOT touch the water) and spread it all over my cooling bar. A few Sprinkles later & back in the fridge to set for an hour or two.

I like the thick chocolate layer on top and use dark chocolate only because I find that more milk chocolate makes it a bit too sweet. Just try not to eat it all in one go!
DAIRY FREE VERSION: Use dark chocolate & a cooking spread (instead of milk choc & butter)
TOP TIP: Always have a small bowl of boiling hot water to dip your measuring spoon into when using Golden Syrup. A hot spoon will release the syrup more easily ensuring you get an accurate measure.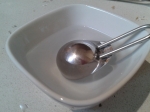
Tags: afternoon tea, bake, baking, biscuit, biscuit cake, cafe retro, cake, chocolate, dairy-free, dark chocolate, easy bake, food, fridge cake, marshmallows, milk chocolate, no bake, recipe, rocky road, tiffin

Next week our White Hot Chocolate Sauce is going all a flutter by blushing Pink for Valentines. I used my basic recipe adding some red food colouring paste at the end. You want a bold colour as it will go paler once you add the milk.
As always, a note about food colouring: remember to start with a little and keep adding until you get the colour you desire – you can always add but you can’t take away! Pastes and gels are preferable to liquid colours as they don’t affect the texture of your recipe.
Add a few spoonfuls to hot milk, a dash of raspberry/strawberry syrup a squirt of cream and finish with some little heart sprinkles!
Or come in and try one of ours!


Fed up of the usual Valentines Day rigmarole?
Why not take your loved one out for lunch?
Book a table here next Friday (14th Feb) and we will give you a complimentary Red Velvet Valentines cupcake!
Tags: cafe retro, chocolate, food colouring, hot chocolate, hot drinks, pink drink, raspberry, recipe, strawberry, valentines, white chocolate, white hot chocolate, White Hot Chocolate Sauce

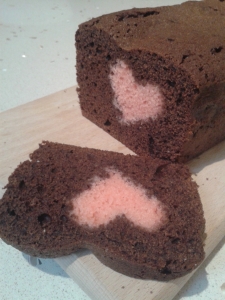
Black Forest Hidden Heart Loaf Cake!
After the success of my Battenberg with the hidden Union Jack inside I thought it would be fun to make a hidden heart cake for Valentines Day. I found some amazing Cherry Essence and used Black Forest Gateau as the flavour inspiration. There are a few hidden heart cake recipes on the web, but here’s how I made my Black Forest Valentines Hidden Heart Loaf Cake (now that’s a mouthfull!!)
January Recipe: Valentines Hidden Heart Loaf Cake
First pre-heat the oven to 180ºC and grease & line a 1lb loaf tin (to ensure neat corners, lightly grease the tin then cross over two strips of measured baking parchment)
You need to make two sponges, one red & one chocolate. Each Sponge will be a three egg recipe – this is the easiest cake recipe ever! You weigh the whole eggs and that weight is the weight you need for all the other ingredients.
Cake One: Mix together using an electric whisk or mixer: Butter (or cooking margarine) and Caster Sugar
Add your Eggs one at a time, beating each one in fully before adding the next
Add a few drops of Red or Pink Food Colouring & Cherry Essence (I use red colouring paste to get a bright pink colour)
AN IMPORTANT NOTE ABOUT FOOD COLOURING: As a general rule pastes and gels are better than liquid colourings. Make sure you start with a little and gradually as you can always add but you can’t take away! Make sure you have a definite colour that you are happy with before you bake.
Gently stir in Self-raising Flour
Bake in the oven for approx 20 minutes or until an inserted skewer comes out clean. Then leave for 10 minutes before removing from the tin and cooling completely – then put it in the fridge for half an hour to firm up.
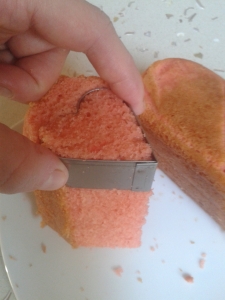
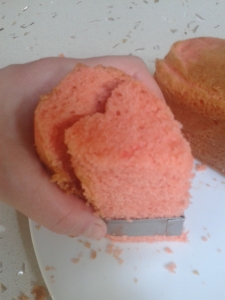
When the cake is completely cold & firm, stand it on it’s end and carefully draw your heart shaped cookie cutter down the length of the sponge. You can cut the cake into smaller sections if it makes it easier. When you have done this it is time to prepare Cake Two:
Cake Two:
Re-line your loaf tin with parchment paper as before
Mix together using an electric whisk or mixer: Butter (or cooking margarine) and Caster Sugar
Add your Eggs one at a time, beating each one in fully before adding the next
Gently stir in Self-raising Flour & Cocoa Powder – you need to substitute 25g of the weight for Cocoa Powder
Pour about 1/4 – 1/3 of the mixture into the lined tin then carefully place the heart cut out sponge lengthwise. Cover with the remaining mixture.
Bake in the oven for approx 20 minutes or until an inserted skewer come out clean. Then leave for 10 minutes in the tin before turning out. Dust with icing sugar or drizzle with pink coloured water icing.
Wait for your loved ones to be watching before you amaze then by cutting the first slice!
You could of course use Raspberry or Strawberry Essence instead of Cherry & bake with a lemon sponge – not substituting any flour for cocoa, and adding Vanilla Essence & Lemon Zest

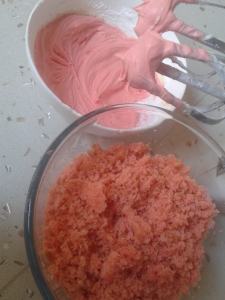
TIP: Turn your pink cake cut-offs into Truffle Pops!
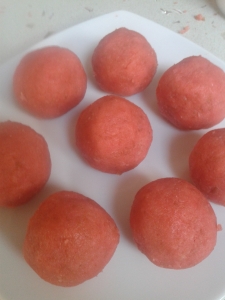
Just crumble up and mix with enough buttercream (icing sugar & butter beaten together) to bind it together, then shape into balls. Refrigerate for an hour before covering in melted chocolate. You can make these into traditional cake pops too, my favourite Valentines themed ones are dipped in pink chocolate melt (which you can buy in Lakeland) & covered in sprinkles with a Love Heart attached.
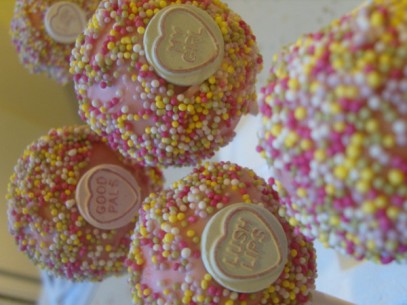
Love Heart Cake Pops
Tags: afternoon tea, bake, baking, cafe retro, cake, chocolate, dairy-free, easy bake, food, hidden heart cake, valentines
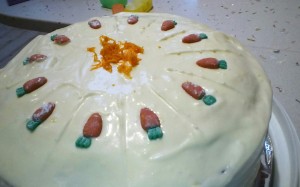
This Carrot Cake recipe, like our Chocolate Coffee ‘Tiramisu’ Cake, falls into the ‘very easy to make’ category as it all gets mixed up together in one bowl. The Cream Cheese frosting needs to be full-fat & mustn’t be over mixed otherwise it goes a bit runny. I would recommend using the more expensive Philadelphia as the cheaper ‘own brand’ cream cheeses go really runny too. It is fine to make with a Soya alternative which are readily available & makes this cake dairy-free.
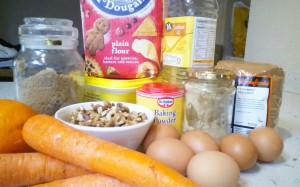
March Recipe: Carrot Cake
First pre-heat the oven to 160ºC and grease & line a 23cm round cake tin
Put into a large mixing bowl:
175g Plain Flour
1 tbsp Baking Powder
1 tsp Ground Cinnamon
1/2 tsp Ground Ginger
100g Butter (I use cooking margarine)
75g Sunflower Oil
175g Soft light brown Muscavado Sugar
3 Free-range Eggs, beaten
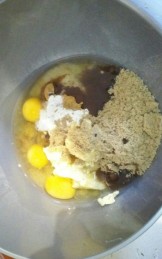
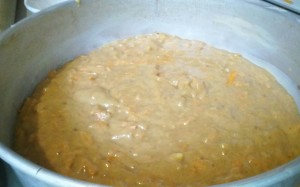
Beat together until smooth (using a wooden spoon or in a mixer with a ‘K’ beater) then STIR in:
200g Carrots, peeled & grated
2 tbsp Orange Juice
60g Crushed Walnuts (or Pecans)
Pour into the prepared cake tin, level the top & put in the oven to bake for 60-70 minutes until it is brown, firm & an inserted skewer comes out clean.
Leave to cool before covering with your Cream Cheese frosting.
Make your Frosting: whisk together 100g cream cheese, 150g icing sugar, 100g butter (margarine) until smooth.


Spread the Frosting over your sponge and then decorate how you like it with Walnut Pieces? Grated Orange Zest?
They also make delicious cupcakes or can be cooked in a square tin & cut into traybake bites
NB: For the version I make at the Cafe, I make two of these sponges sandwiched together with some of the frosting then decorated with more frosting & topped with handmade mini Carrots made with Icing

Tags: afternoon tea, bake, baking, cafe retro, cake, carrot cake, coffee morning, cream cheese frosting, cupcake, dairy-free, easy bake, food, recipe, traybake

We used to make this Goulash every year for our stall at the Bath Christmas Market and we had many people returning year after year just for this! Last week we made it for 140 people at a school fundraiser & I promised to write-up the recipe. A delicious & easy recipe and a favourite of Marc Archer from Blowout Sax in Bath, I’m sure it will become a favourite recipe of yours too.
Recipe: Viennese Potato & Frankfurter Goulash
Serves: 10
Crisp 250g Bacon Dice/Lardons in 150g Vegetable Oil
Add 2 sliced Onions (250g) then stir in 2tsp Caraway Seeds and sweat until soft & golden
Stir in 25ml (5tsp) Paprika and an optional half tsp chilli powder and fry for 30 seconds (being careful not to let it burn as this makes the paprika bitter) then add 75g (5tblsp) Tomato Puree and fry for another 10 minutes, stiring regularly
At this stage you can freeze the mixture to make up into Goulash when required
TO FINISH:
Add 1.25ltr water and 50g Stock Powder (Swiss Bouillon Powder is best) add 2kg Chunky Diced Floury Potatoes (Maris Piper) and bring to the boil then cook until the potatoes are soft and cooked through.
Add 500g Thickly Sliced Bockwurst Sausages (Frankfurters) and cook until the sausages are heated through and the potatoes are breaking up to make a thick sauce
Serve in bowls with Chunky Bread on the side & garnish with Parsley
Tags: austrian, bacon, cafe retro, cake, christmas, crispy bacon, easy, food, frankfurter, goulash, paprika, potato, recipe, stew
When the nights start drawing in & winter begins to stretch its icy fingers it is time to wrap your hands around a warm mug of something hot…
This week we are serving a delicious Banoffee flavoured Hot Chocolate and next week we will be making Hot White Chocolate Snowballs using our very own home-made sauce. Want to make some at home? Here’s how:
Heat 1 can Condensed Milk in a saucepan, stirring constantly so it doesn’t catch or turn brown.
Add 300g White Chocolate Buttons take off the heat & whisk in until melted.
Mix in 1tsp Vanilla Essence
Pour into 2 sterilized jam jars & store in the fridge.
To serve: stir into hot milk – 1 tsp at a time to taste
Just add Coconut syrup & a sprinkle of Coconut Flakes for a White Hot Chocolate Snowball
Tags: banoffee hot chocolate, cafe retro, coconut, condensed milk, drink, hot chocolate, hot chocolate snowball, recipe, white chocolate sauce, white hot chocolate
Tags: afternoon tea, almonds, bake, baking, battenberg, cafe retro, cake, easy bake, food, jubilee, jubilee battenberg, marzipan, recipe

I have chosen this delicious cake which falls in to the ‘very easy to make’ category and is a popular afternoon tea choice at the Cafe. This is based on a recipe by the fabulous Mitzie Wilson whose book I used constantly as a student – baking for my flatmates to brighten up our days. Instead of Mitzie’s Marscapone Icing I tend to use Cream Cheese frosting (a cheaper ingredient for a poor student which has now stuck!). I also think this keeps better in the fridge as a Marscapone topping can look pretty sad the next day & nobody wants a sad-looking cake.
Recently voted by one of our customers: the best cake she has EVER had. You can’t beat that for a recommendation! Here’s how I make it:
April Recipe: Tiramisu Cake
First pre-heat the oven to 170ºC and grease & line a cake tin
Dissolve 1 tblsp instant coffee in 1tsp boiling water then put into a large mixing bowl with:
125g Self-Rasing Flour
1 tsp Baking powder
125g Butter (I use cooking margarine)
125g Golden Caster Sugar
60g Grated Dark Chocolate (or coarsely chopped in a processor)
2 Free-range Eggs


Mix together then pour into the prepared cake tin.

Place in the oven to bake for 25-35 minutes until springy to the touch.
Leave to cool then pour over Brandy (you could also use Rum or Marsala) and leave to soak in.

Make your Icing: whisk together 100g cream cheese, 150g icing sugar, 100g butter (margarine) until smooth.
Spread this over your sponge and then dust liberally with cocoa powder
They also make delicious & unusual cupcakes and you can booze them up as much as you like for a grown up party!
NB: For the version I make at the Cafe, I make two of these sponges (using decaf coffee) soaked in a slightly Brandy flavoured sugar syrup then sandwiched together with some of the frosting.
Tags: afternoon tea, bake, baking, brandy, cafe retro, cake, chocolate, coffee, cream cheese frosting, dessert, easy bake, food, recipe, tiramisu
With the weather getting chillier what could be better than a delicious warming, filling soup full of natural goodness and VERY simple to make! Perfect heated up in one of our thermal Bento boxes ready for lunchtime. As with all soup, really take your time with the first steps – don’t rush it – as all the flavours should be there before you add the liquid. For all our mushroom soup fans, here’s how we make it:
January Recipe: Mushroom Soup
Makes 1 litre of Soup
Fry 1 finely chopped Onion in a pan with 50g Butter until soft and golden
Add 500g sliced Mushrooms and fry until golden brown
Add 1 litre Vegetable Stock, Season to taste with Salt and Pepper and add a pinch of dried mixed herbs
Bring to the boil then reduce the heat and simmer for 20 minutes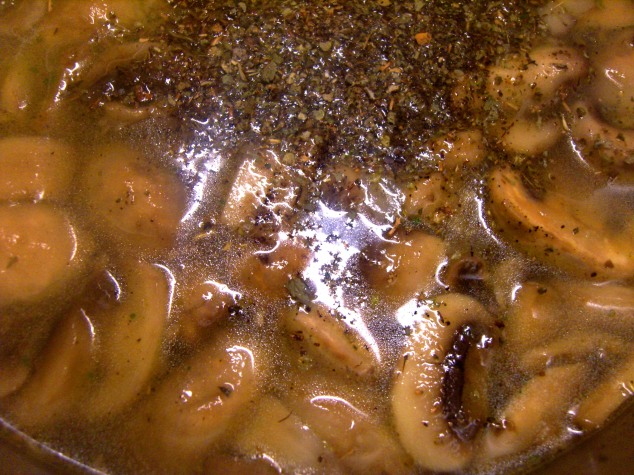
Add a splash of Double Cream (or Soya Equivalent) and heat through gently before Blending with a hand blender or processor

SERVE WITH: crusty bread
I always have a pot of Vegetable stock at home in the freezer made from all those left over & wrinkly veg boiled up in seasoned water then strained. I would however recommend getting some Marigold Vegetable Stock Powder (also available as Vegan) for your store cupboard.
Tags: bento, cafe retro, dairy-free, food, mushrooms, recipe, simple, soup, soya cream, starter, vegan, vegetarian


